Showing posts with label Gadgets. Show all posts

Tuesday, November 16, 2010

Pumpkin Pie with Spiced Whipped Cream


This pie is a slightly more delicate version of the traditional pumpkin pie. The cinnamon and ginger add a bit of character to the fresh whipped cream.


A regular pie plate is too shallow for the amount of filling you'll end up with.  I use a deep-dish pie plate to compensate, but you can cook the extra filling in a custard cup if don't have a larger plate.  Just remember to adjust baking times to accommodate the bakeware.  

There's nothing more disappointing, than producing a beautiful pie with a burnt rim.  To prevent burning my exposed edges, I use a metal pie-shield.  I usually wait until the crust looks cooked and is a bit golden, before I set the shield on top.

1 9 inch pie shell (use a deep-dish pie plate)
1 15 oz can pumpkin
1 14 oz can sweetened condensed milk
1/4 cup sour cream
1 tsp cinnamon
1/4 tsp ground ginger
1/4 tsp allspice
1/2 tsp vanilla
2 large eggs

Spiced Whipped Cream:
3/4 cup whipping cream, chilled
2 T powdered sugar
dash cinnamon
dash ginger

Preheat oven to 400 degrees.  Prick pie crust all over with the tines of a fork to vent.  Par-bake in a deep-dish pie plate for 10 minutes.  Cool crust on rack and reduce oven temperature to 350.

In large bowl, beat eggs until foamy.  Add remaining ingredients and mix well.  Pour into the piecrust, and bake until filling is puffed and set in center, about 55 minutes.

Meanwhile, beat whipping cream, sugar and spices until fluffy (don't over-beat or the cream will turn to butter).

Serve each slice of pie with a generous dollop of spiced whipped cream.  Delightful!

Make-Ahead Turkey Stock and Gravy


With all the other things you have to fuss with at the last minute, why fiddle with making the gravy when you can do so ahead, and get the same great results?  Here's what I do to save time and stress.

At your local butcher or grocery store, purchase 6 pounds of inexpensive of turkey parts, such as wings, legs, backs, and necks.  You'll also need:

5 ribs chopped celery
1 large, onion, chopped
1 head garlic, crushed
12 cups canned or fresh chicken broth
1 stick butter
1/2 cup flour
salt and pepper to taste


Preheat oven to 375.  Place turkey parts in a roaster, and brown them lightly over a large burner on your cooktop.  Because of the fat content already present, you shouldn't need any extra oil in the roaster.  Sprinkle with salt and pepper and transfer roaster to the oven.  Roast for 45 minutes.

Remove from oven, and add the chopped vegetables and the chicken broth.  Return to oven and continue cooking for an additional hour.  Cool.  Remove chicken parts from roaster with a slotted spoon.  Scrape bottom of roaster to remove baked on bits.  Strain stock and place in the refrigerator for a few hours so the stock congeals and the fat solidifies at the top.  Lift the fat off the stock and discard.

At this point, the stock can be frozen for up to 6 months.

Two to three days ahead of Thanksgiving:
Melt butter in a stock pot over medium heat. Whisk in flour and cook for 1 - 2 minutes, stirring constantly.  I've found that a flat whisk works really well for blending liquids into a roux (fat and flour mixture).  Gradually add the stock, whisking until smooth.  Bring to a boil, simmer 2 minutes to thicken, then reduce heat to medium low; simmer another 10 minutes.  Season to taste.  Makes about six cups of golden brown turkey gravy.

The finished gravy will keep in the refrigerator for up to three days.
Note: if you are intent upon using the drippings from your Thanksgiving turkey for last-minute gravy, consider using the make-ahead stock instead of chicken broth or water.  You won't believe how deliciously rich your gravy will be!

Monday, November 8, 2010

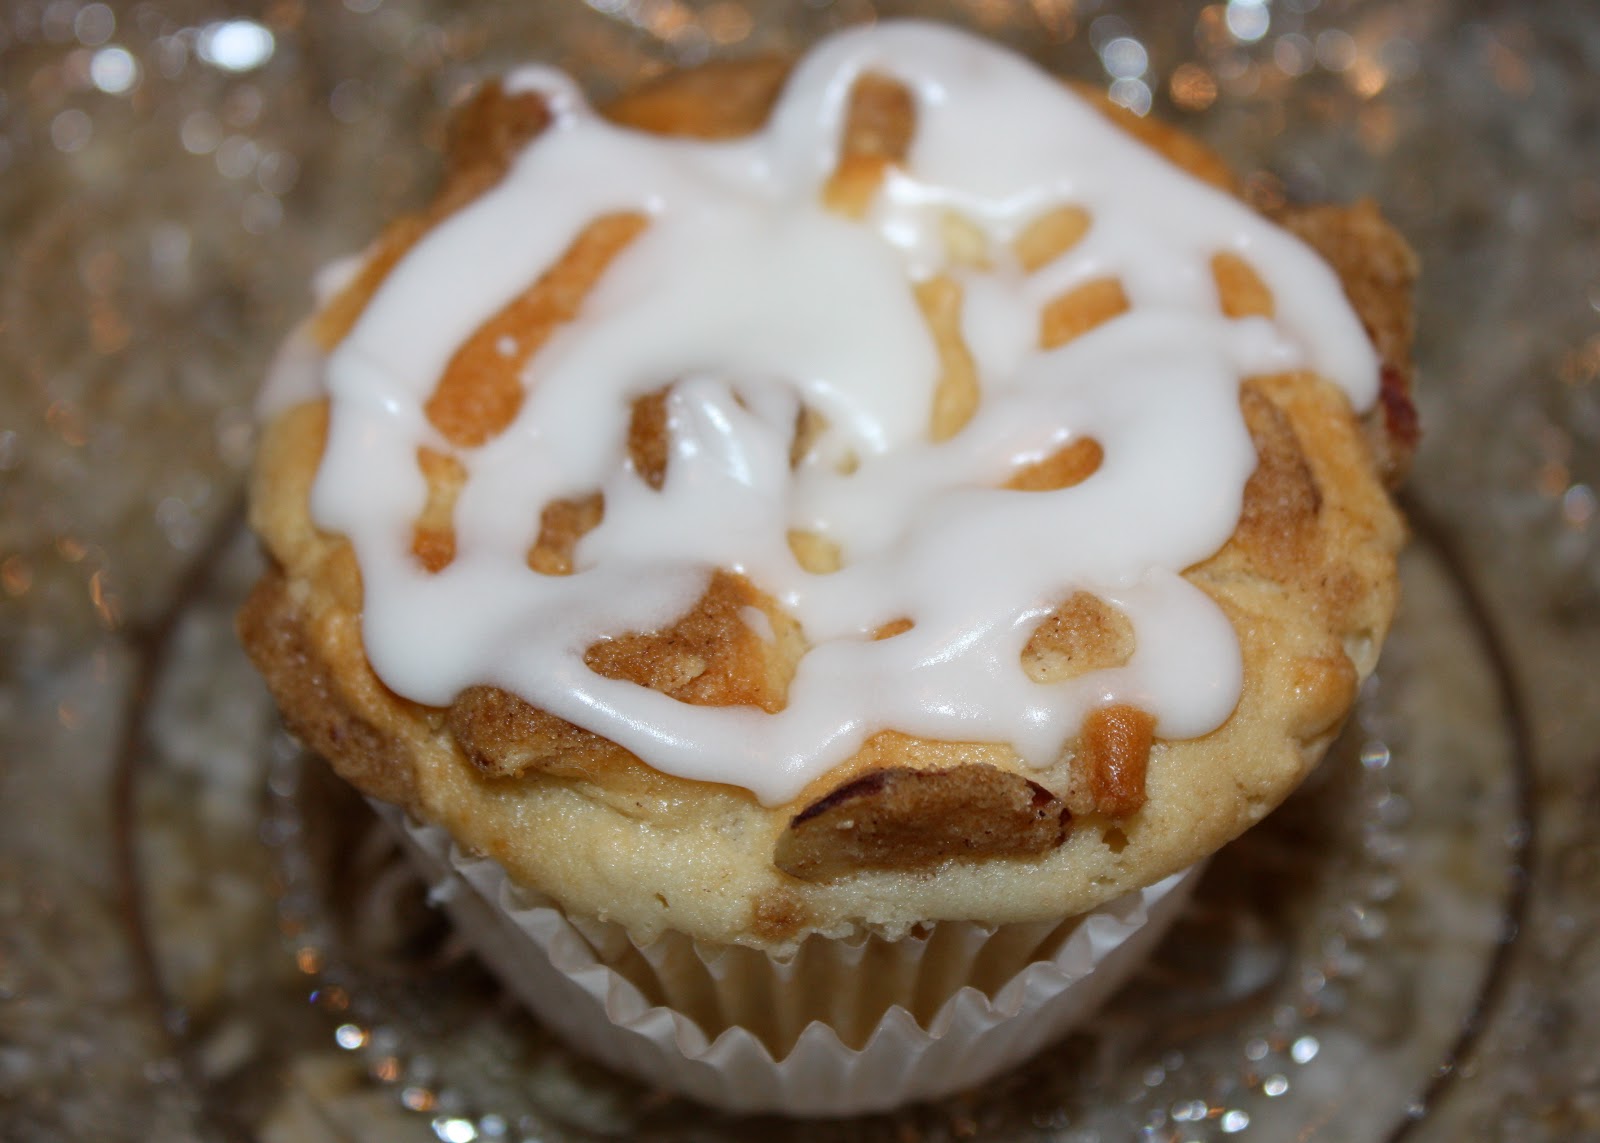
Almond-Apple Cupcakes with Cinnamon Streusel


The perfect little bite to accompany a cup of coffee or tea.

These pretty little cupcakes are akin to coffee cake.  I found the recipe in a Cooking Light magazine so they're supposed to be a bit less caloric, and have a slightly lower fat content than a traditional breakfast cake.  

1 1/2 cups all-purpose flour
1/2 tsp baking powder
1/4 tsp salt
1/4 tsp baking soda
3/4 cup granulated sugar
1/4 cup less-fat cream cheese, softened
1/4 cup butter softened
2 T amaretto (almond-flavored liqueur, or 2 T milk and a 1/4 tsp almond extract)
1 tsp vanilla extract
1 large egg
1/2 cup reduced-fat sour cream
1/4 cup 2% milk
3/4 cup finely chopped cooking apple
1 T all-purpose flour


Streusel Topping:
2 T all purpose flour
2 T brown sugar
1/4 tsp cinnamon
2 T butter, chilled
2 T sliced almonds

Glaze:
1 cup powdered sugar
4 tsp 2% milk

Preheat oven to 350 degrees, and place liners in 12 muffin cups.  Spray top of muffin tray with cooking spray.

Combine 1 1/2 cups flour, baking powder, baking soda and salt in a small bowl.  Set aside.
In large bowl, combine granulated sugar, 1/4 cup butter and cream cheese.  Beat well.  Add amaretto, vanilla and egg to sugar mixture, and beat with an electric mixer.  
In another small bowl, combine sour cream and milk.  Whisk until blended.  
Combine apple and 1 tablespoon flour.
Add flour mixture and sour cream mixture alternately to sugar mixture, beginning and ending with flour mixture.  Beat just until blended (don't over-mix).  Fold in apples.
Divide batter evenly into muffin cups.

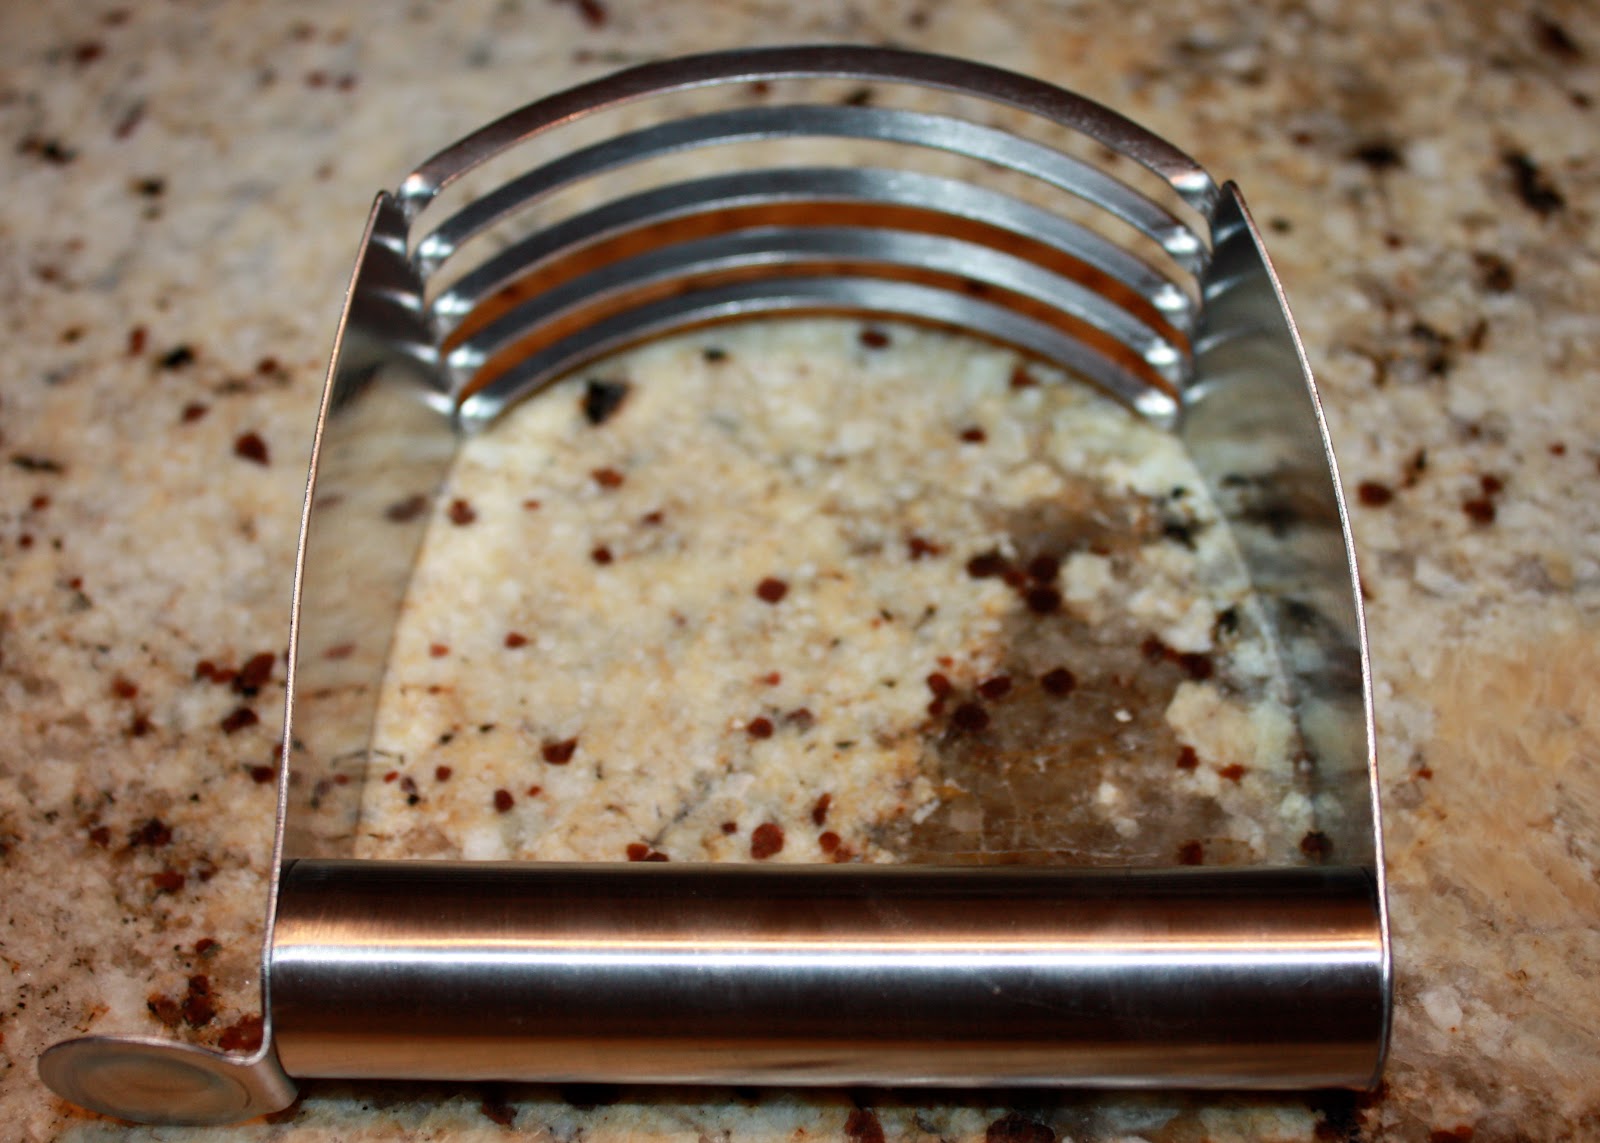
To prepare streusel, combine 2 tablespoons flour, brown sugar and cinnamon.  Cut in 2 tablespoons butter with a hand pastry blender (photo at right).  Add the sliced almonds.  Crumble the streusel evenly over each cupcake.

Bake at 350 degrees for 27 minutes or until wooden toothpick inserted in center comes out clean.  Remove from pan and cool on a wire rack.

Prepare glaze.  When the cupcakes are cool enough, drizzle the glaze over each one.  Serve and enjoy!


Thursday, November 4, 2010

Bushels and Bushels of Apples

Apple recipe links at the bottom of this post.

"Anyone can count the seeds in an apple, but only God can count the number of apples in a seed."  Robert H. Schuller


Who doesn't like visiting an apple orchard and cider mill?  

When I was a kid living outside of Detroit, we'd pile in the car each fall and set off for the local cider mill in Franklin, Michigan, where we'd jockey for a parking position along the narrow, old, village street upon which the mill sat.  I could have found my way from the car with my eyes closed, simply by following the intoxicating aroma of frying donuts and sweet cider.  We were allowed one donut and a cup of cider each, before returning  home with a gallon jug, a bag of apples, and smiles on our faces.  

Mom's fresh apple pies, fritters and sauce were standards in our house, but in the fall, what we most enjoyed, were Dad's candied apples.  I'm not sure how or why this particular job fell to my father, but it was always his production and he made the most of it.

When my children were small, we found a similarly delightful orchard and mill outside of Toledo, Ohio where we lived at the time.  I can't remember the name of the place, but memories linger still of the girls with their cherubic faces pressed up against the glass that separated the cider press from the rest of the barn, where bags of apples, pumpkins and gourds, piled high on wooden tables, beckoned customers.  There weren't any homemade donuts at the orchard in Toledo, but the girls got something they thought even better, pony rides! 

Last summer, on one of our many trips back and forth to the cottage, I noticed a small wooden sign on the side of the road advertising a cider mill.  My heart leaped with joy at the thought of having a place to take my grandchildren for a paper cupful of handmade, local cider.  On a subsequent trip, I pulled off the road to investigate and found, after some meandering, the most beautifully maintained family orchard, cider mill, and country gift shop.

I made several stops back this fall with my daughter and grand kids, where we sampled the apple fritters, turnovers and pies, that were assembled and baked before our eyes in the wonderful little barn-kitchen, by Amish neighbors.  
Across from the kitchen, the men-folk spread layers of crushed apples onto burlap lined trays, they'd stack high under the press.  Finally, with the flip of a switch, the press came alive, and as it compacted, the sweet, golden cider rained down from the trays, and into a cauldron.                                                       
Apples are most prolific in the month of October, and they say, are best eaten shortly after they're picked while their flesh is still firm, and crisp.  I never thought about the actual age of a picked apple eaten in April, or May.  Imagine the days before refrigeration, when apples were stored in wooden barrels, buried beneath the dirt floor of the family root cellar.  Its a wonder there was anything worth eating come spring, or summer.

I love apples, and bought bushels of them this autumn, which I processed into sauce and butter to be savored this winter.  My favorite eating apple is a Honey Crisp, but they're not always easy to find, and are usually the first variety to sell-out at neighborhood orchards and markets. So far this autumn, we've enjoyed apple pie and fritters, crisps, muffins and apple cake.  Check out the links below for some of those recipes.  Check back often, as more will be posted.


Old Fashioned Apple Crisp


With so many varieties of apples, how do you pick one for baking?  I like my apples to cook down so they're soft and juicy.  I don't like biting into a piece of apple, so I use a "cooking" apple like a McIntosh or Empire.  

I've never been a big fan of piecrust, but I adore the fresh fruit fillings.  I find myself substituting a crumbly topping for the top layer of pie dough all the time, so it figures I'd be a big fan of a good old fashioned crisp or cobbler.  This apple crisp is special because it has a hint of citrus, and isn't too sweet.  Rick likes it because the topping is truly crisp and stays that way for a few days afterward, if you have leftovers.

For citrus flavor, this recipe calls for the zest of an orange and lemon, plus a few tablespoons of fresh juice.  I'm going to take this opportunity to share my enthusiasm for my microplane.  With kitchen space at a premium, I never buy a gadget unless I'm sure I'm going to use it.  My microplane is well worth the space it takes inside my drawer.  I've found that if you turn it upside down while zesting, it's extra easy to collect and measure the zest right in the measuring spoon.  No mess, or scraped finger tips and knuckles.  I love it! 

5 pounds of good cooking apples
grated zest of 1 lemon
grated zest of 1 orange
2 T fresh orange juice
2 T fresh lemon juice
1/2 cup granulated sugar
2 tsp ground cinnamon
1 tsp ground nutmeg

Topping:
1 1/2 cups flour
3/4 cup granulated sugar
3/4 cup brown sugar
1/2 tsp salt
1 cup oatmeal
1/2 pound (2 sticks) cold unsalted butter, cut into small pieces.

Preheat oven to 350 degrees.  Butter an oval 9 x 14 x 2 inch baking dish.

Peel, core and slice apples.  Combine the apples, fruit zests, juices, sugar and spices.  Pour into the baking dish.

Combine the flour, sugars, salt, oatmeal and cold butter.  I used my food processor on the pulse setting but, you can also use a hand pastry mixer to combine.  The end result, should look crumbly.  Scatter this mixture evenly over the apples.

Place the baking dish (crisp) on a baking sheet (just in case there is a spill) and bake for one hour, or until the top is brown and the crisp is bubbly.  Always test to make sure the crumb topping in the center is fully cooked, not mushy.

I like to serve this warm, over a dish of vanilla ice cream, or with fresh cinnamon whipped cream.  Rick actually prefers his cold, or at room temperature, and unadorned.  Whichever way you serve it, you're gonna love it!

Awesome Apple Butter

4 pounds apples (about 16)
4 cups sugar
2 - tsp cinnamon
1/4 tsp cloves
2 cups cider (optional)

Wash apples.  Peel, core (unless you are using a food mill) and quarter.  Combine apples and 2 cups cider or water in a large saucepan.  Simmer until the apples are very soft.  If using a food mill, (photo at bottom) process in batches to remove seeds and skin.  If the apples are pared, puree in a food processor being careful not to liquify the pulp.  Either way, you should end up with two quarts of apple pulp.

Back in the saucepan, combine apple pulp, sugar, and spices.  Cook very slowly, until thick enough to round up on a spoon.  Mixture will thicken as the liquid cooks down.  This may take several hours depending upon how juicy your apples are.  Its impossible to thicken the butter too much, but its very easy to scorch, so be sure to stir often with a rubber spatula, and keep the heat low.

Makes 3 pints of apple butter.  The butter must be refrigerated if you aren't going to process it.  Keep some for yourself and share the rest!

To Process:
When thickened, ladle hot butter into hot jars, leaving 1/4 inch headspace.  Remove air bubbles.  Adjust two-piece caps.  Process 10 minutes in a boiling water bath.


A traditional, Foley food mill is wonderful for separating the skin and seeds from cooked fruit.